ThinkPad X60 Tablet Recovery guide


Return to index

This section documents how to recover from a bad flash that prevents your ThinkPad X60 Tablet from booting.

ROM images for this machine are well-tested in libreboot, so bricks are rare. The most common cause of a brick is operator error, when flashing a ROM image. In most cases, the cause will be that there is no bootblock, or an invalid one.

Brick type 1: bucts not reset.

You still have Lenovo BIOS, or you had libreboot running and you flashed another ROM; and you had bucts 1 set and the ROM wasn’t dd’d.* or if Lenovo BIOS was present and libreboot wasn’t flashed.

There are 2 64KiB bootblocks possible, in the upper part of the ROM image. By default (bucts set to 0), the top one is used. If bucts is set to 1, the lower one (the one before the top one) is used. This bootblock is the first code that executes, during romstage as per coreboot hardware initialization.

BUC is short for Backup Control and TS is short for Top Swap. This is a special register on Intel platforms. Lenovo BIOS sets PRx registers, preventing software re-flashing, but there is a bug in the protection, allowing everything except the upper 64KiB from being flashed. By default, coreboot only puts a bootblock in the upper region. If you flash such a ROM, while bucts is set to 1, the system won’t boot because there’s not a valid bootblock; this is common if you’re re-flashing when coreboot is already installed, and you didn’t set bucts back to 0.

When you install on X60/T60 the first time, you set this bucts bit to 1, then you re-flash a second time and set it back to 0.

In this case, unbricking is easy: reset BUC.TS to 0 by removing that yellow cmos coin (it’s a battery) and putting it back after a minute or two:

*Those dd commands should be applied to all newly compiled X60 ROM images (the ROM images in libreboot binary archives already have this applied!):

dd if=coreboot.rom of=top64k.bin bs=1 skip=$[$(stat -c %s coreboot.rom) - 0x10000] count=64k
dd if=coreboot.rom bs=1 skip=$[$(stat -c %s coreboot.rom) - 0x20000] count=64k | hexdump
dd if=top64k.bin of=coreboot.rom bs=1 seek=$[$(stat -c %s coreboot.rom) - 0x20000] count=64k conv=notrunc

(doing this makes the ROM suitable for use when flashing a system that still has Lenovo BIOS running, using those instructions: http://www.coreboot.org/Board:lenovo/x60/Installation.

Brick type 2: bad ROM image

In this instance, you might have flashed a ROM without the top bootblock copied to the lower 64KiB section in the ROM, and you flashed the ROM for the first time (from Lenovo BIOS), in which case there is not a valid bootblock.

In this scenario, you compiled a ROM that had an incorrect configuration, or there is an actual bug preventing your system from booting. Or, maybe, you set BUC.TS to 0 and shut down after first flash while Lenovo BIOS was running. In any case, your system is bricked and will not boot at all.

“Unbricking” means flashing a known-good (working) ROM. The problem: you can’t boot the system, making this difficult. In this situation, external hardware (see hardware requirements above) is needed which can flash the SPI chip (where libreboot resides).

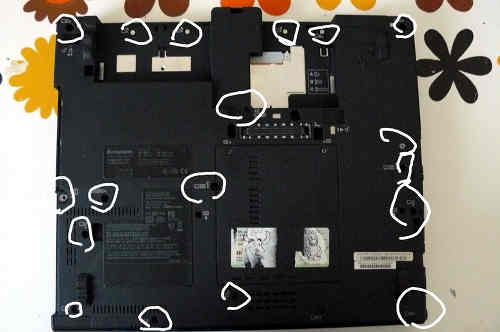
Remove those screws:
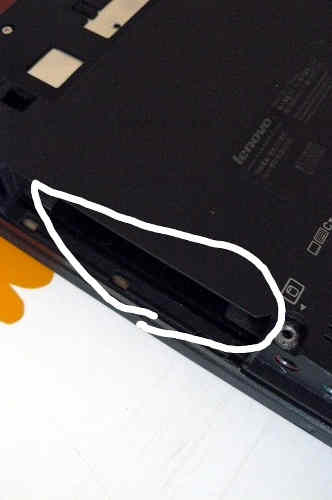
Remove the HDD:

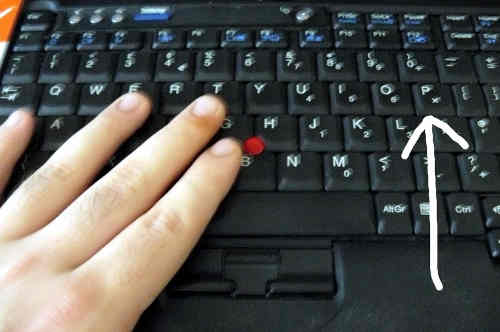
Push keyboard forward to loosen it:

Lift:

Remove those:

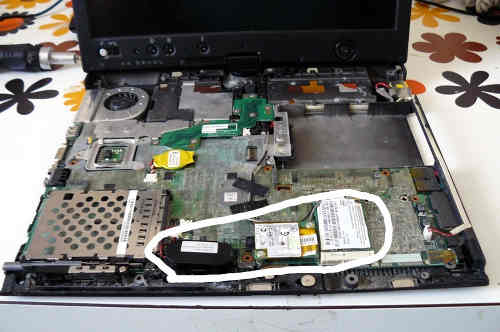
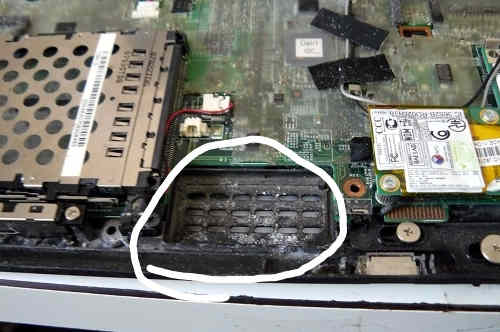
Also remove that (marked) and unroute the antenna cables:

For some X60T laptops, you have to unroute those too:

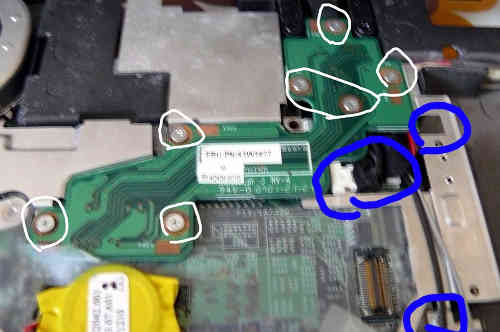
Remove the LCD extend board screws. Also remove those screws (see blue marks) and remove/unroute the cables and remove the metal plate:

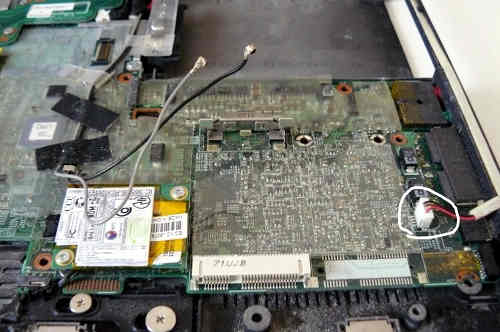
Remove that screw and then remove the board:

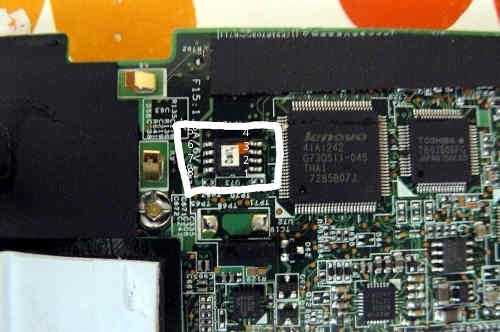
This photo shows the flash location:

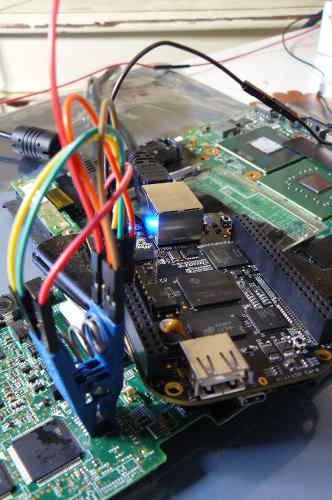
This photo shows an SPI flasher used, with SOIC8 test clip:

Refer to the external flashing guide:

Externally rewrite 25xx NOR flash via SPI protocol

NOTE: Do not use the 3.3v rail from your SPI programmer. Leave that disconnected. For 3.3v, plug your charger into the mainboard (but do not power on the mainboard) when the clip is connected. Before removing the clip, disconnect the charger. This will provide adequate 3.3v DC at correct current levels. The SPI flash on an X60 Tablet shares a common 3.3V rail with many other components on the mainboard, which all draw a lot of current, more than most flashers can provide.

Reverse the steps to re-assemble your system, after you’ve flashed the chip.

Markdown file for this page: https://libreboot.org/docs/install/x60tablet_unbrick.md

Subscribe to RSS for this site

Site map

This HTML page was generated by the Untitled Static Site Generator.