Install Libreboot on Lenovo ThinkPad T440p
| Specifications | |
|---|---|
| Manufacturer | Lenovo |
| Name | ThinkPad T440p |
| Released | 2013 |
| Chipset | Intel QM87 |
| CPU | Socket G3, Intel Haswell |
| Graphics | Intel HD 4600 |
| Display | 14" 1366x768 -> 1920x1080 |
| Memory | 16GB DDR3L DIMMs (2x8 GB) |
| Architecture | x86-64-v3 (+ older) |
| Original boot firmware | Lenovo UEFI firmware |
| Intel ME/AMD PSP | Present. Disabled with me_cleaner. |
| Flash chip | SOIC-8 16MB/128Mbit system firmware |
W+: Works without vendor firmware;
N: Doesn't work;
W*: Works with vendor firmware;
U: Untested;
P+: Partially works;
P*: Partially works with vendor firmware
?: UNKNOWN AT THIS TIME| Features | |
|---|---|
| Internal flashing with original boot firmware | N |
| Display (if Intel GPU) | W+ |
| Display (discrete GPU, SeaBIOS payload only) | N |
| Audio | W+ |
| RAM Init | W* |
Get the ROM image
Download from release
If you’re using a release ROM, please ensure that you’ve inserted extra firmware required refer to the guide for that (, failure to adhere to this advice will result in a bricked machine):
- Intel ME (vendor blob)
Build from source
./mk -b coreboot lenovo_thinkpad_t440p_12mbInternal/Software Flashing
Default Libreboot firmwares updatable.
External/Hardware Flashing
You can use dd to easily split your rom into the two separate portions for external flashing. The first chip, SPI1, is 8MB, possibly labeled SPI1 on the board’s silkscreen; it represents the first 8MB from offset zero in your ROM image file. Thus:
dd if=libreboot.rom of=spi1_8mb.rom bs=1M count=8
dd if=libreboot.rom of=spi2_4mb.rom bs=1M skip=8
Flash the top chip with spi2_4mb.rom, and the 8MB chip with spi1_8mb.rom. Don’t worry about knowing which chip is which on a standard setup; flashprog will let you know if the image size is incorrect for the chip you’re flashing.
Disassembly
Start by removing the back cover screws and the main battery.
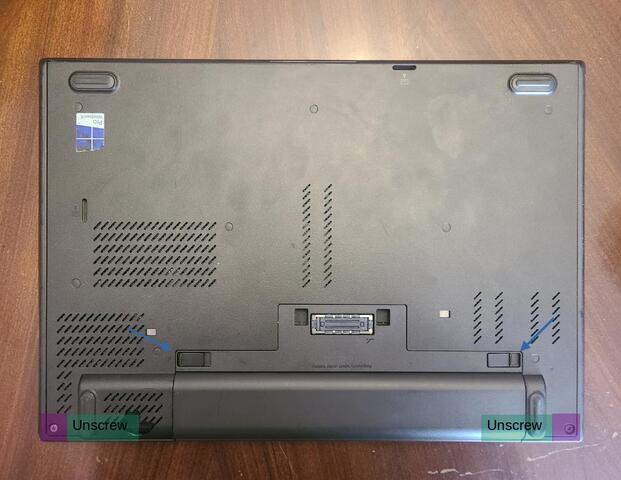
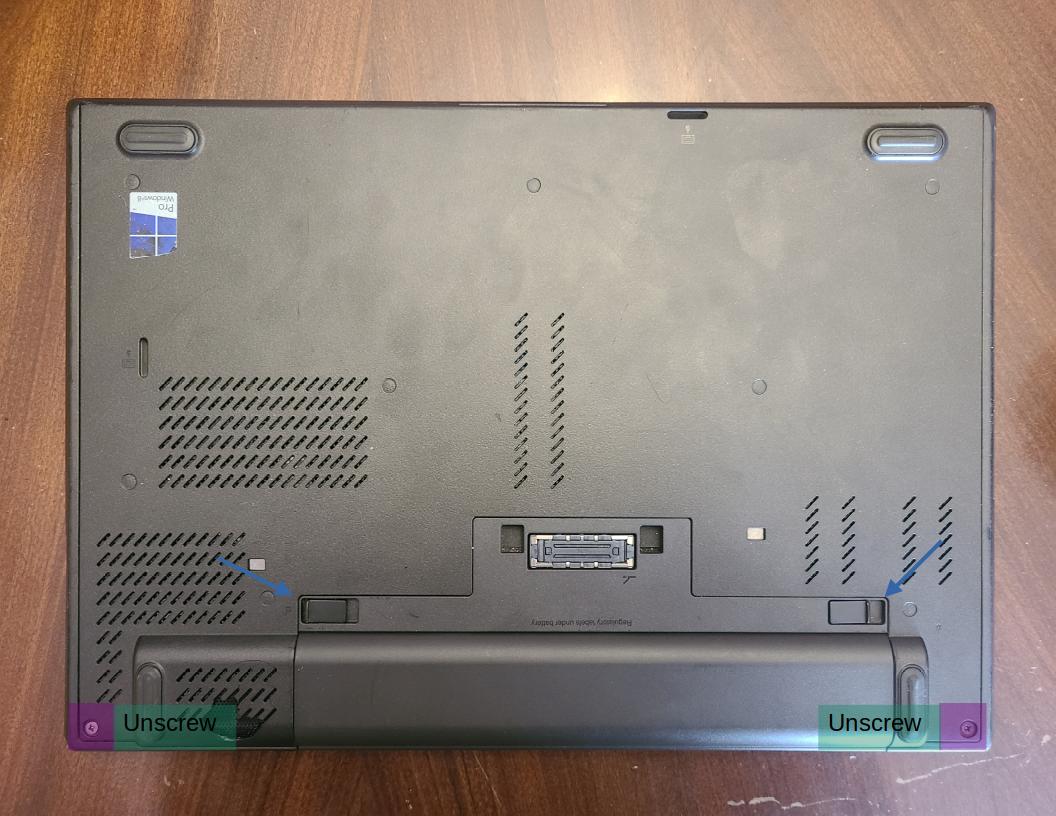
You can then remove the back cover by sliding it off. Next you need to:
- Unplug the cmos battery
- Unplug and unroute the fan cable
- Unplug and unroute the black LED cable
- Remove all visible screws
Note: the ultrabay screw will loosen, but not come out of the assembly
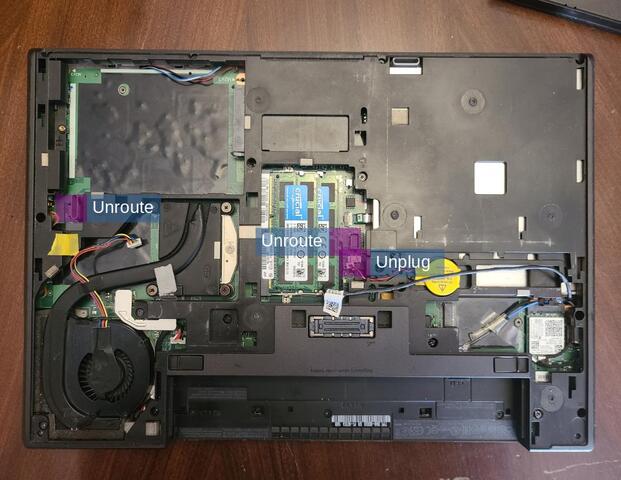
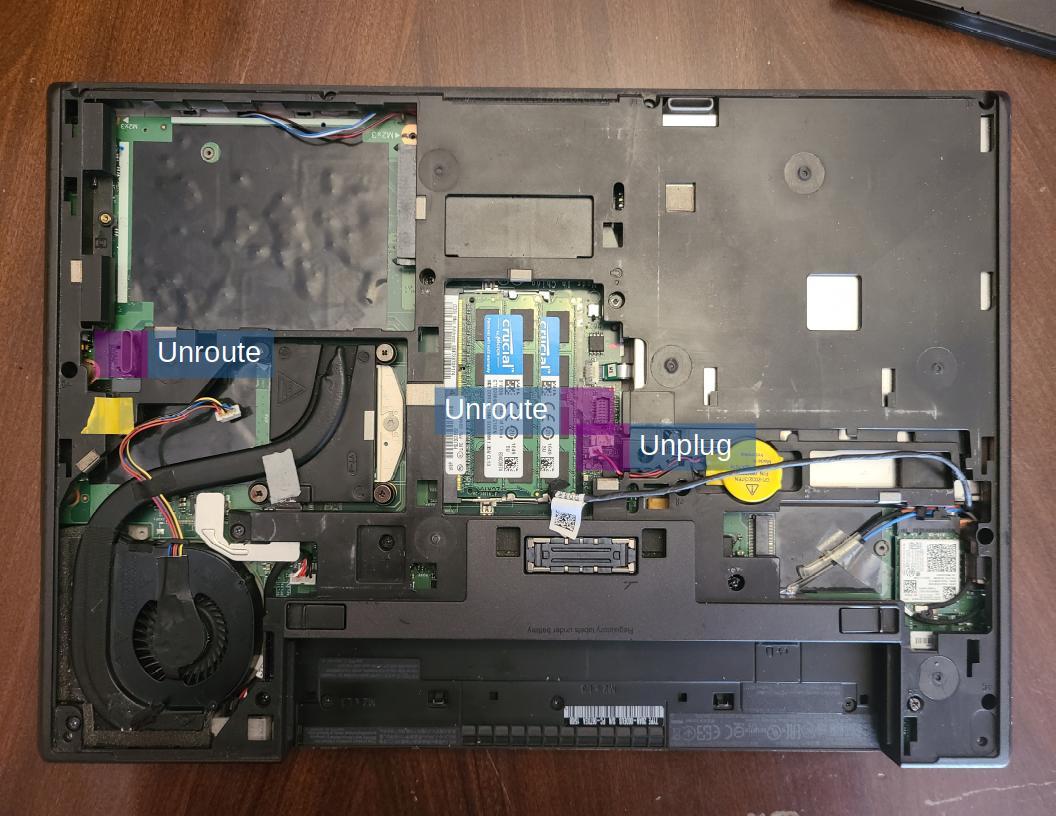
Now you can pull up around the sides of the bottom assembly to release it. Pull it upwards and lift it open to the front of the machine like a clamshell. Make sure not to break the wires connecting the assembly to the rest of the machine.
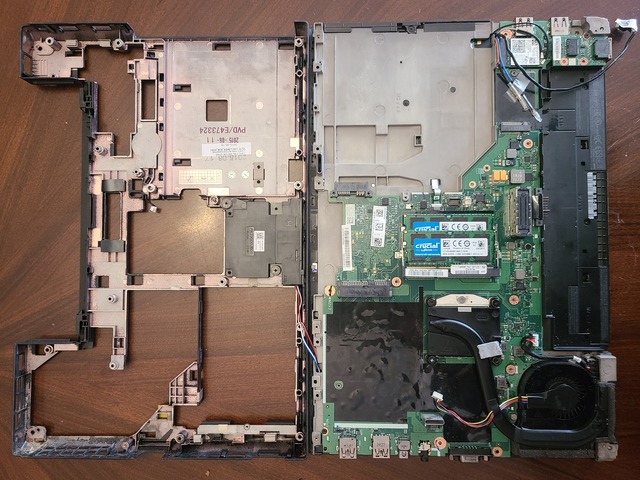
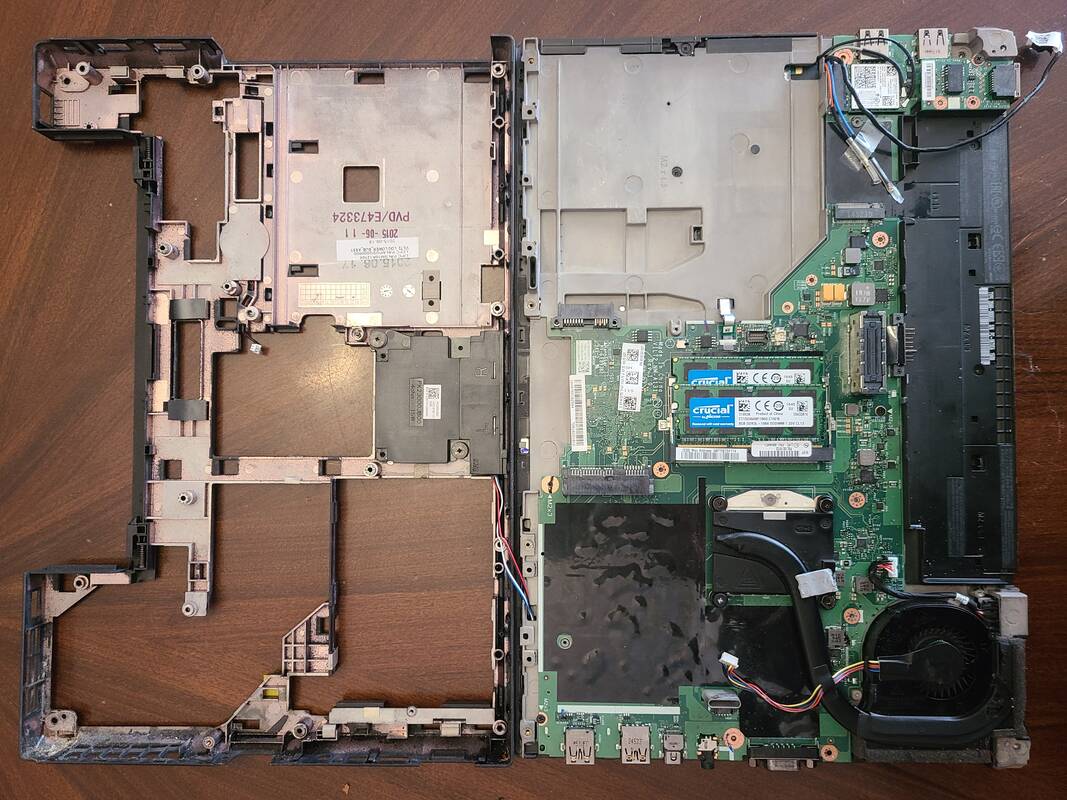
You should now be able to see the two flash chips near the RAM.
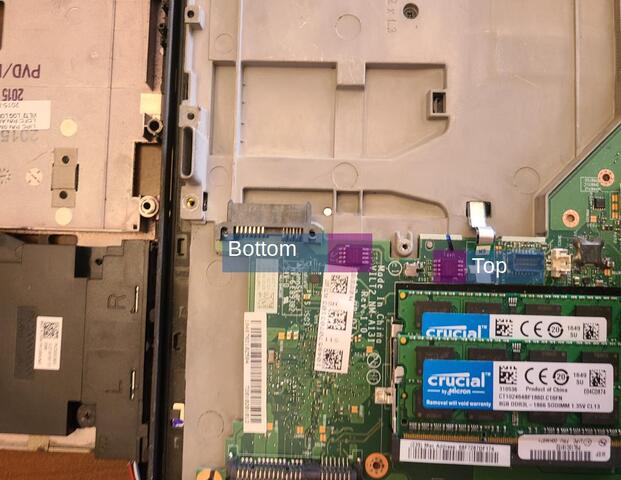
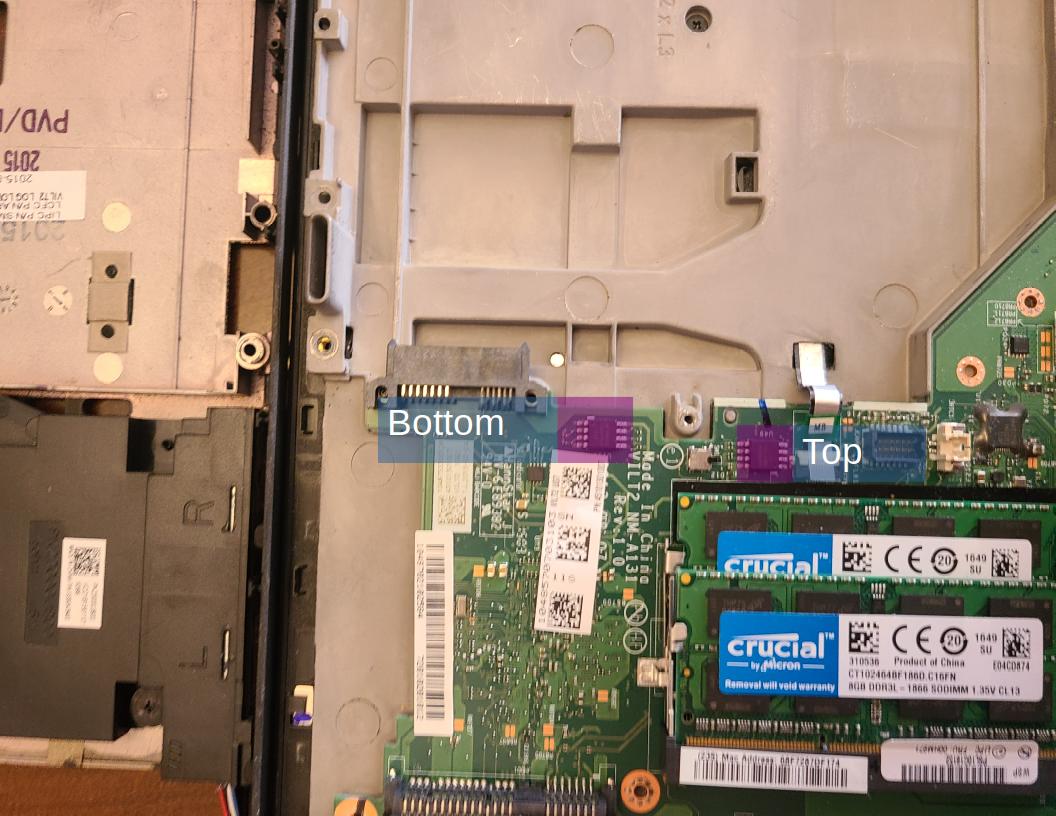
You can now proceed to flash this machine.
Device Specific Quirks
- Not working: NVIDIA Quadro K1100M/K2100M
thinkpad_acpi Issue
Does not load correctly on the T440p. If you encounter this issue, check this page for details as to how to fix this.
Expanded_Specifications
*1 Compatible ThinkPad Docks: 40A0 (Basic), 40A1 (Pro), 40A2 (Ultra)
Markdown file for this page: https://libreboot.org/docs/install/t440p_external.md
This HTML page was generated by the Libreboot Static Site Generator.