---
title: Install Libreboot on Lenovo ThinkPad X230/X230T
x-toc-enable: true
...
Open source BIOS/UEFI firmware
------------------------------
This document will teach you how to install Libreboot, on your
Lenovo ThinkPad X230 laptop motherboard.
Libreboot is a [Free Software](https://writefreesoftware.org/learn) project
that replaces proprietary BIOS/UEFI firmware.
**Minifree now sells the Libreboot T480, instead of the Libreboot X230. See:
**
**NOTE: Libreboot standardises on [flashprog](https://flashprog.org/wiki/Flashprog)
now, as of 27 January 2024, which is a fork of flashrom.
The reason why was explained, in
the [Libreboot 20240225 release](../../news/libreboot20240225.md#flashprog-now-used-instead-of-flashrom)**
**[PLEASE READ THESE INSTRUCTIONS BEFORE INSTALLING](ivy_has_common.md), OR
YOU MAY BRICK YOUR MACHINE!! - Please click the link and follow the instructions
there, before flashing. For posterity,
[here is the link again](ivy_has_common.md).**
NOTE: Internal flashing (from vendor firmware) to Libreboot is possible, on
this board, but the steps are a bit more complex than using an external flasher.
See: [internal ivybridge flashing](ivy_internal.md)
Read the [Ivybridge/Haswell common guide](ivy_has_common.md) if you want more information.
All of the following instructions assume that you've cloned lbmk and are operating from the
root of that project. To do so, run
git clone https://codeberg.org/libreboot/lbmk
cd lbmk
You can now follow the rest of the instructions.
Preparing a release Rom
-----------------------
**Please follow this prior to flashing, or you may brick your machine.**
Please [inject vendor files](ivy_has_common.md) prior to flashing. You can also
use this guide to change the built-in MAC address for your Intel Gigabit
Ethernet device; doing so is advisable, because otherwise you will have a
default, generic MAC address.
Splitting The Rom
-----------------
You can use `dd` to easily split your rom into the two separate portions for
external flashing.
dd if=libreboot.rom of=top.rom bs=1M skip=8
dd if=libreboot.rom of=bottom.rom bs=1M count=8
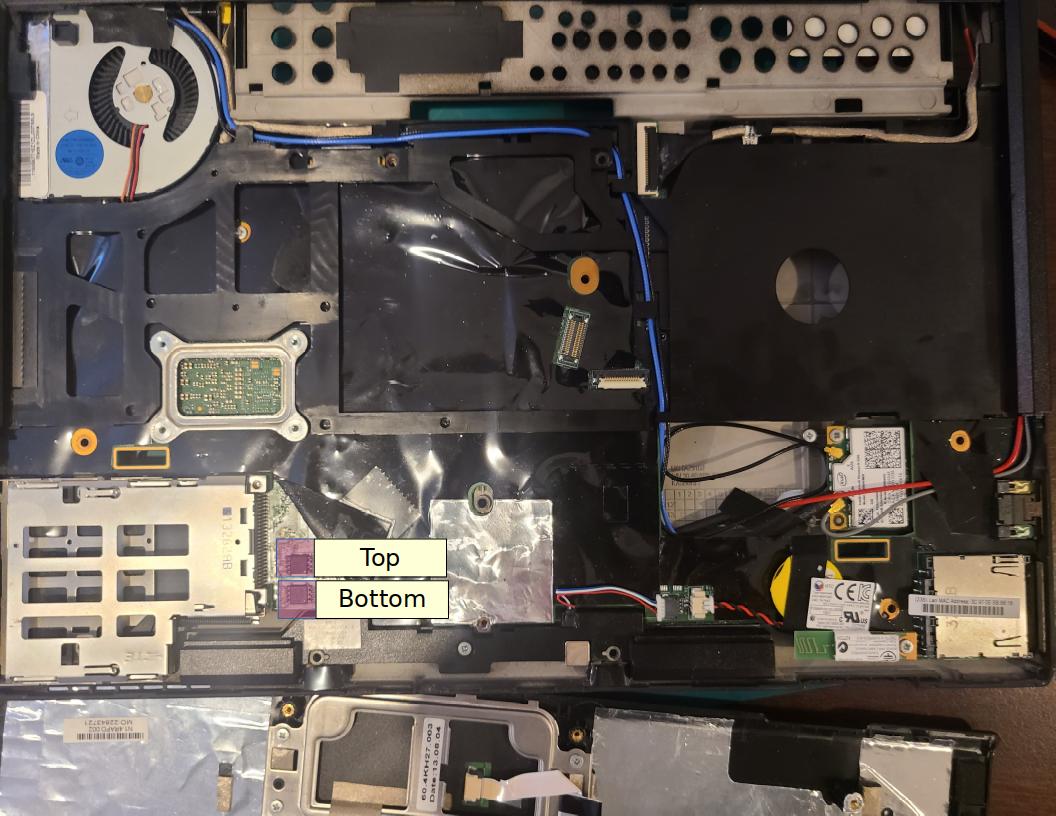
Flash the top chip with top.rom, and tho bottom chip with bottom.rom.
Don't worry about knowing which chip is which on a standard setup; flashprog will let you know if the
image size is incorrect for the chip you're flashing.
Disassembly
-----------
Start by removing the battery.
Remove every screw from the bottom of the machine marked with a keyboard/touchpad indicator.
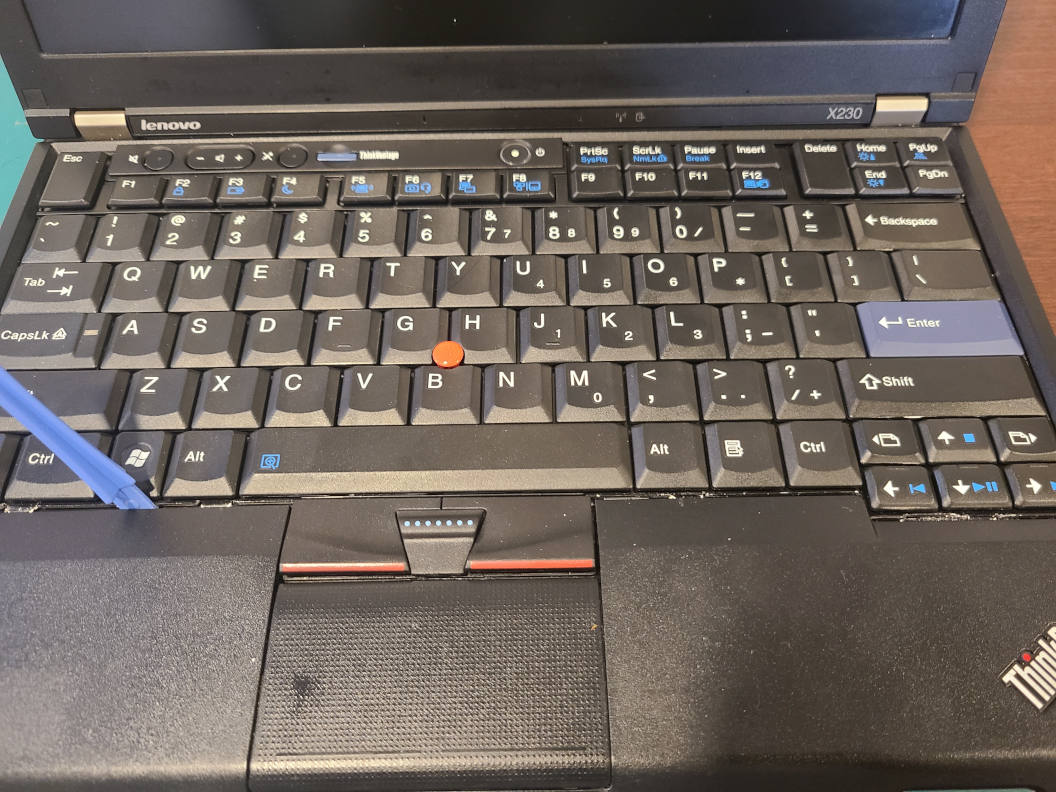
Pry up the keyboard and separate it from the palmrest.
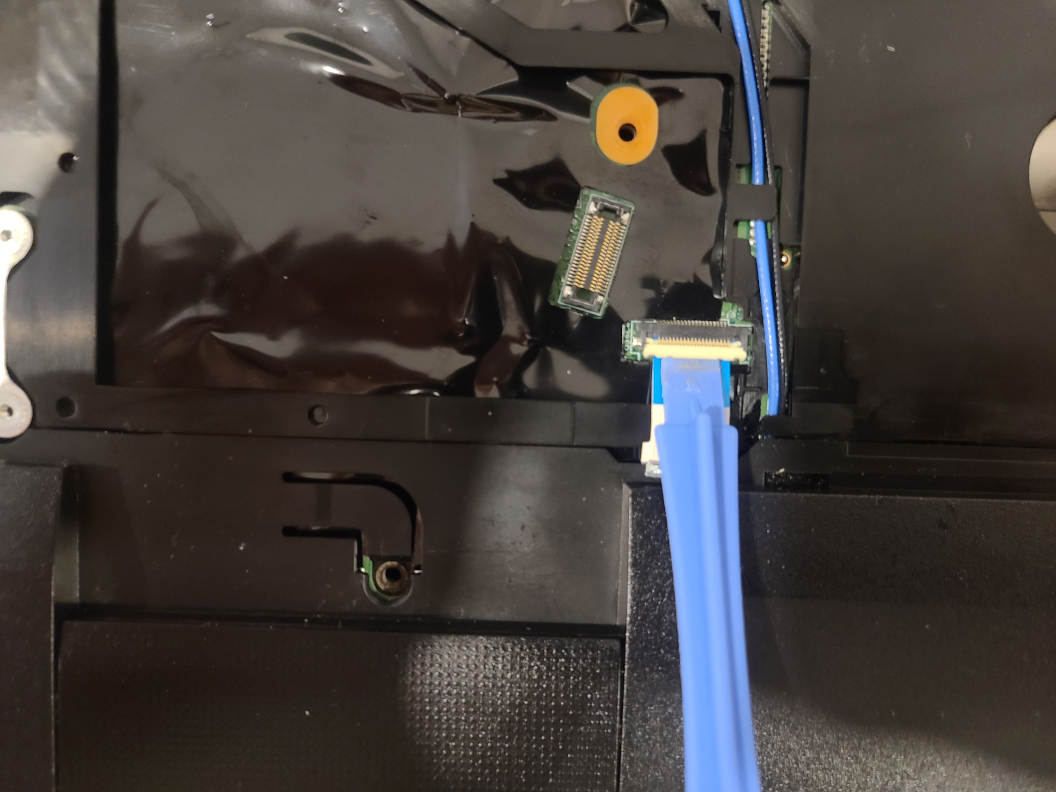
Unplug the ribbon cable from the palmrest and pry it off as well.
Pull up the protective cover to reveal the two soic chips for flashing.
[//]: # "SPDX-License-Identifier: GFDL-1.3-or-later"
The Canoeboot version of this page is: